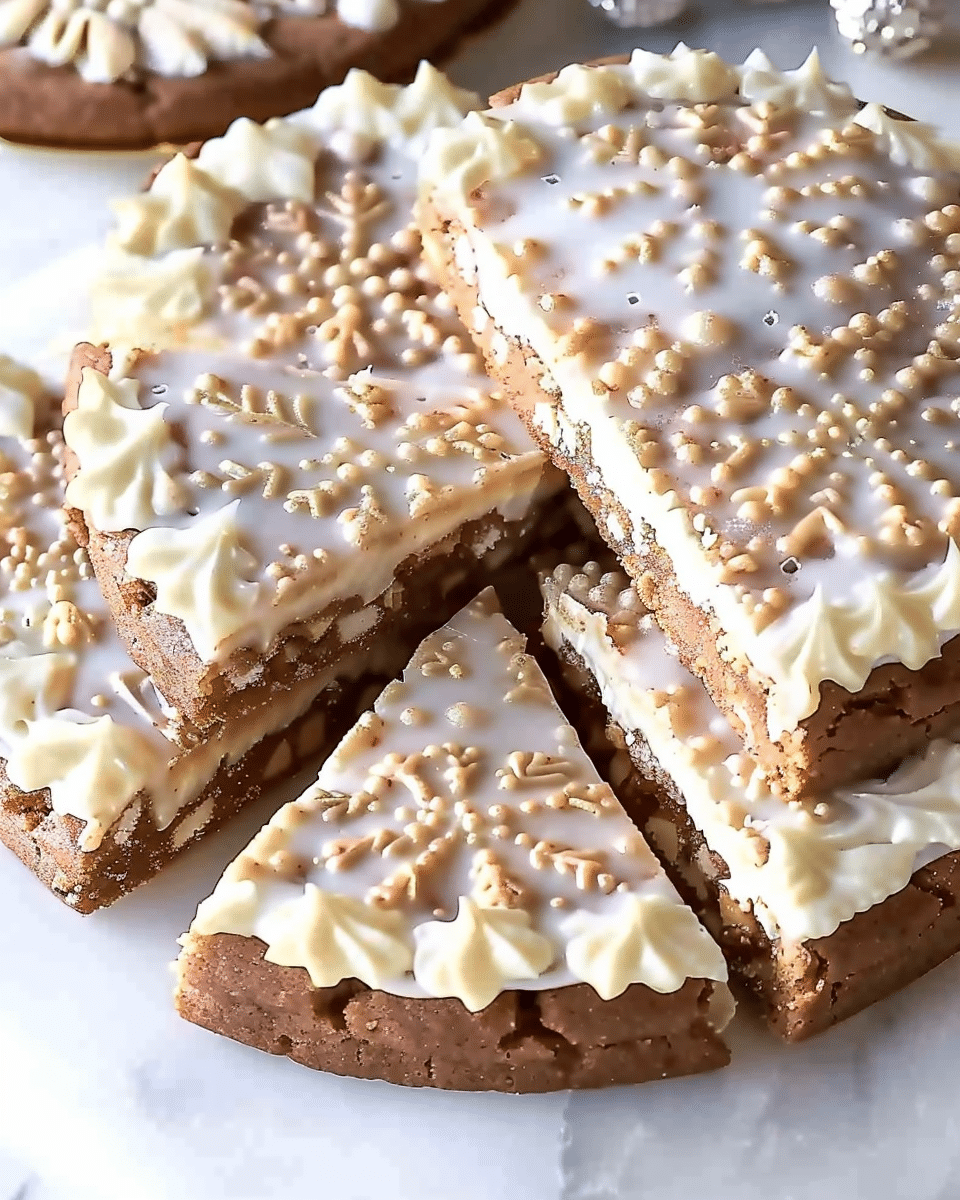
Frozen-Style Decorated Cookies are my magical take on sugar cookies inspired by the beloved winter wonderland. With delicate snowflake designs, sparkling sugar, and icy blue and white royal icing, these cookies bring a touch of fairy-tale magic to my kitchen. They’re buttery, soft on the inside, and crisp on the edges — perfect for parties, holidays, or just when I want to bake something whimsical.
Why You’ll Love This Recipe
I love how these cookies combine the simplicity of a classic sugar cookie with the beauty of detailed decorations. The dough rolls out easily and holds its shape well, which means my snowflakes and “Frozen” designs always turn out sharp and pretty. Decorating them feels like an art project, and they taste as good as they look.
Ingredients
(Here’s a tip: Check out the full list of ingredients and measurements in the recipe card below.)
For the cookies:
-
All-purpose flour
-
Baking powder
-
Salt
-
Unsalted butter, softened
-
Granulated sugar
-
Egg
-
Vanilla extract
-
Almond extract (optional, for flavor)
For the royal icing:
-
Powdered sugar
-
Meringue powder (or pasteurized egg whites)
-
Vanilla extract
-
Water
-
Gel food coloring (blue, purple, and white for Frozen-style designs)
-
Edible glitter or sparkling sugar (optional, for shimmer)
Directions
-
I whisk together the flour, baking powder, and salt in a bowl.
-
In a separate bowl, I beat the butter and sugar until light and fluffy, then add the egg, vanilla, and almond extract. I gradually add the dry ingredients until the dough comes together.
-
I divide the dough in half, wrap it in plastic wrap, and chill for at least 1 hour.
-
Once chilled, I roll the dough out on a floured surface to about ¼-inch thickness and cut it into snowflake or round shapes.
-
I bake at 350°F (175°C) for 8–10 minutes, until the edges are just set but not browned. I let the cookies cool completely before decorating.
-
For the royal icing, I whisk together powdered sugar, meringue powder, vanilla, and water until the icing is glossy and holds peaks. I divide it into bowls and tint with gel food coloring.
-
I use piping bags with small tips to outline and flood the cookies, then layer details like snowflake lines, dots, and swirls. For extra sparkle, I sprinkle edible glitter or sugar before the icing dries.
Servings and timing
This recipe makes about 24 cookies, depending on the size of my cutters. It takes about 20 minutes of prep time, 10 minutes of baking, and 1–2 hours of decorating (depending on detail level).
Variations
Sometimes I flavor the dough with lemon or orange zest for a citrusy twist. I’ve also swapped the vanilla in the icing for almond or peppermint extract to make it feel even more wintry. For an easier version, I dip the cooled cookies in tinted icing and decorate with store-bought snowflake sprinkles.
storage/reheating
I store the decorated cookies in an airtight container at room temperature for up to 5 days. If I need to make them ahead, I freeze the plain baked cookies (undecorated) for up to 2 months, then thaw and decorate when I’m ready.
FAQs
Do I need to chill the dough?
Yes, chilling the dough helps the cookies hold their shape when cut and baked.
Can I use buttercream instead of royal icing?
Yes, but royal icing dries hard and shiny, making it better for detailed decorating and stacking.
How do I get smooth icing?
I flood the cookies with slightly thinned royal icing and use a toothpick to spread it evenly and pop air bubbles.
Can I decorate with kids?
Absolutely! I let kids use squeeze bottles or brushes with edible glitter for a fun, less-precise decorating option.
How long does royal icing take to dry?
It usually takes 6–8 hours at room temperature to dry completely, so I decorate them the night before serving.
Conclusion
Frozen-Style Decorated Cookies are as fun to make as they are to eat. With their sparkling snowflake patterns and wintry colors, they’re perfect for parties, holidays, or cozy baking days. They always make me feel like I’ve stepped into a snowy wonderland, and they disappear quickly whenever I share them.
Print
Frozen-Style Decorated Cookies
- Total Time: 1 hour active, plus decorating/drying time
- Yield: 24 cookies
- Diet: Vegetarian
Description
Frozen-Style Decorated Cookies are buttery sugar cookies shaped into snowflakes and decorated with icy blue, white, and purple royal icing. Sparkling sugar and edible glitter add a magical, wintry touch, making them perfect for parties and holidays.
Ingredients
For the Cookies:
2 3/4 cups all-purpose flour
1 teaspoon baking powder
1/2 teaspoon salt
1 cup unsalted butter, softened
1 cup granulated sugar
1 large egg
1 teaspoon vanilla extract
1/2 teaspoon almond extract (optional)
For the Royal Icing:
4 cups powdered sugar
3 tablespoons meringue powder (or pasteurized egg whites)
1 teaspoon vanilla extract
6 tablespoons water (adjust as needed)
Gel food coloring (blue, purple, and white)
Edible glitter or sparkling sugar (optional)
Instructions
- In a bowl, whisk together flour, baking powder, and salt.
- In another bowl, beat butter and sugar until light and fluffy. Add egg, vanilla, and almond extract (if using). Mix in dry ingredients until dough forms.
- Divide dough in half, wrap in plastic, and chill for at least 1 hour.
- Preheat oven to 350°F (175°C). Roll dough to 1/4-inch thickness on a floured surface. Cut into snowflake or desired shapes.
- Bake 8–10 minutes until edges are just set (not browned). Cool completely.
- Make icing: Beat powdered sugar, meringue powder, vanilla, and water until glossy and stiff peaks form. Adjust water for desired consistency.
- Divide icing into bowls, tint with food coloring, and fill piping bags.
- Outline and flood cookies, then add details like snowflake lines and swirls. Sprinkle glitter or sugar before icing sets.
- Let cookies dry 6–8 hours before stacking or packaging.
Notes
Add citrus zest to dough for extra flavor.
Swap vanilla in icing for almond or peppermint extract for a festive touch.
Use squeeze bottles or brushes for kid-friendly decorating.
Dip cookies in tinted icing and top with sprinkles for a quicker version.
Freeze undecorated cookies for up to 2 months; decorate after thawing.
- Prep Time: 20 minutes (plus chilling and decorating)
- Cook Time: 10 minutes
- Category: Dessert
- Method: Baking
- Cuisine: American
Nutrition
- Serving Size: 1 cookie
- Calories: 160
- Sugar: 15g
- Sodium: 60mg
- Fat: 7g
- Saturated Fat: 4g
- Unsaturated Fat: 2g
- Trans Fat: 0g
- Carbohydrates: 23g
- Fiber: 0g
- Protein: 2g
- Cholesterol: 25mg

