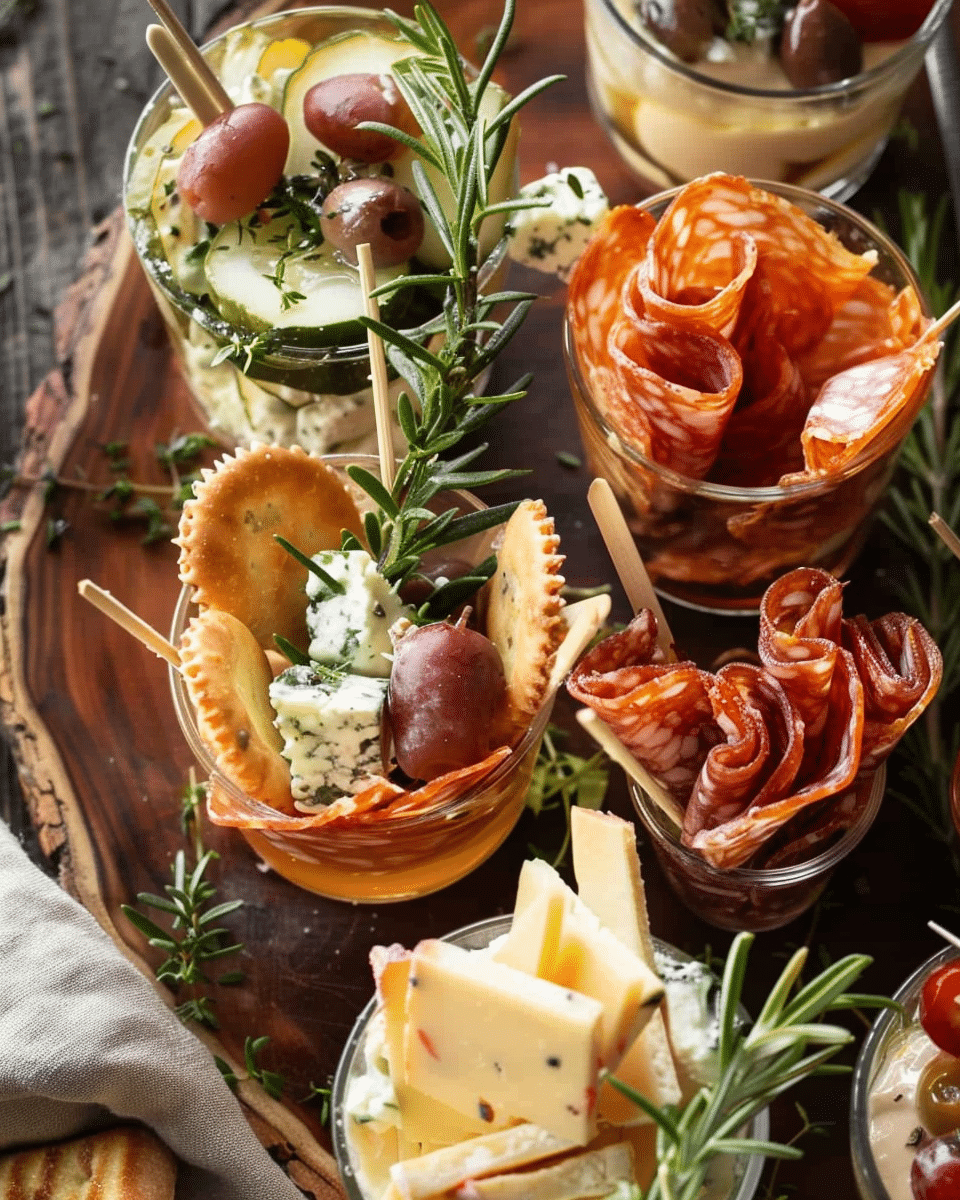
Charcuterie cups are my favorite way to turn a classic grazing board into a fun, portable appetizer. These single-serve treats are perfect for parties, showers, or picnics—anytime I want to impress without the mess of a big communal board.
Why I’ll Love This Recipe
I love how customizable and elegant these cups are. They look upscale but take minimal effort. I can prep everything in advance, and each guest gets their own perfect bite-sized selection—no crowding or double-dipping. It’s classy, sanitary, and fun to eat.
Ingredients
(Here’s a tip: Check out the full list of ingredients and measurements in the recipe card below.)
-
Assorted cured meats (salami, prosciutto, pepperoni)
-
Cubed cheeses (cheddar, gouda, mozzarella balls)
-
Crackers or breadsticks
-
Fresh fruit (grapes, berries)
-
Pickles or olives
-
Nuts (almonds, pistachios)
-
Fresh herbs for garnish (rosemary, thyme)
-
Small cups (plastic, paper, or mini mason jars)
-
Skewers or cocktail picks
Directions
-
I start by cutting cheese into bite-sized cubes and folding or rolling cured meats.
-
I thread meats, cheeses, olives, or small tomatoes onto skewers for structure.
-
In each cup, I layer crackers and breadsticks vertically to anchor the base.
-
I tuck in skewers, then fill gaps with fruit, pickles, nuts, and herbs.
-
I finish by adjusting items so they peek out attractively from the top.
-
I refrigerate until serving, but I let them come to room temp for best flavor.
Servings and Timing
-
Yield: 8–12 individual cups (depending on size and ingredients)
-
Prep: 30–40 minutes
-
Total time: about 40 minutes
Variations
-
Themed cups – I make Mediterranean (feta, olives, hummus), breakfast (mini pancakes, fruit, bacon), or dessert (chocolate, berries, cookies) versions.
-
Kid-friendly – I swap meats for mini sandwiches, string cheese, goldfish crackers, and fruit snacks.
-
Vegetarian – I use roasted veggies, hummus cups, and marinated tofu cubes.
-
Mini jars – When I want a rustic touch, I assemble everything in small mason jars.
Storage/Reheating
I keep the assembled cups in the fridge, covered loosely with plastic wrap, for up to 24 hours. I avoid wet ingredients touching crackers so they stay crisp. No reheating needed—just a quick rest at room temperature before serving to let the flavors shine.
FAQs
Can I make charcuterie cups ahead of time?
Yes, I assemble them up to a day in advance and refrigerate. I keep crackers separate until serving if I want them extra crunchy.
What size cups work best?
I like 9–12 oz clear plastic or paper cups. They’re big enough for a variety of snacks but still easy to hold.
How much meat and cheese should I plan per cup?
I go with 2–3 slices of meat and 2–3 cheese cubes per person, then build around that with extras.
Do I need to use skewers?
Skewers make stacking easier and look great, but I’ve also layered ingredients freely without them for a more rustic feel.
Can I make these gluten-free?
Definitely—I use gluten-free crackers, cured meats without fillers, and make sure all toppings are safe.
Conclusion
Charcuterie cups give me all the wow-factor of a fancy board without the cleanup or crowding. They’re elegant, endlessly customizable, and always the first thing to disappear at a party. Whether I’m prepping for a big event or just a cozy gathering, these little cups deliver huge flavor in every bite.

Charcuterie Cups
5 Stars 4 Stars 3 Stars 2 Stars 1 Star
No reviews
- Author: Evee
- Total Time: 4 hours
- Yield: 12 slices
- Diet: Vegetarian
Description
This Oreo Cream Chocolate Roll features a tender chocolate sponge cake rolled around a fluffy cookies-and-cream whipped filling, topped with silky ganache and crushed Oreos. It’s a nostalgic, indulgent dessert perfect for impressing guests.
Ingredients
For the Cake Sponge:
3 large eggs, separated
¾ cup granulated sugar, divided
2 teaspoons brewed coffee or water
1 teaspoon vanilla extract
¼ cup unsweetened dark cocoa powder
¼ teaspoon salt
1 teaspoon baking powder
¾ cup all-purpose flour
Powdered sugar, for dusting
For the Cookies & Cream Filling:
¾ cup heavy whipping cream
1 tablespoon powdered sugar
1 teaspoon vanilla extract
12 Oreo cookies, crushed
For the Chocolate Ganache Topping:
½ cup heavy whipping cream
1 cup semi-sweet chocolate chips
Additional crushed Oreos, for garnish
Instructions
- Preheat oven to 350°F. Line a 10×15-inch jelly roll pan with foil and spray with nonstick spray.
- Whisk egg yolks with ⅓ cup sugar, coffee (or water), and vanilla until pale and thick. Sift together cocoa, salt, baking powder, and flour.
- In a separate bowl, beat egg whites to soft peaks, gradually adding remaining ⅓ cup sugar, then beat to stiff peaks.
- Fold dry ingredients into yolk mixture, then gently fold in egg whites in three additions.
- Spread batter evenly in prepared pan and bake for 10–12 minutes, until cake springs back lightly when touched.
- Invert hot cake onto a powdered sugar-dusted towel, peel off foil, and roll the cake in the towel into a log. Let cool completely.
- Whip heavy cream, powdered sugar, and vanilla to stiff peaks. Fold in crushed Oreos.
- Unroll the cooled cake, spread filling evenly, and re-roll tightly without towel. Place seam-side down on serving platter.
- Heat cream until just simmering, pour over chocolate chips, let sit 1 minute, then stir until smooth. Pour ganache over the roll and garnish with crushed Oreos.
Notes
Roll cake while hot to prevent cracking.
Use high-quality dark cocoa for richer flavor.
Filling and ganache can be made ahead and stored in the fridge.
Slice cold for clean cuts.
Freeze for up to 1 month, thaw in fridge before serving.
- Prep Time: 48 minutes
- Cook Time: 12 minutes
- Category: Dessert
- Method: Baking
- Cuisine: American
Nutrition
- Serving Size: 1 slice
- Calories: 330
- Sugar: 24g
- Sodium: 95mg
- Fat: 20g
- Saturated Fat: 11g
- Unsaturated Fat: 7g
- Trans Fat: 0g
- Carbohydrates: 36g
- Fiber: 2g
- Protein: 4g
- Cholesterol: 65mg

